
Cabinet Tips
Cabinet Hardware Sizing Guide: Pulls, Knobs, and What Fits
A complete guide to cabinet hardware sizing: pulls vs knobs, how to size for every drawer and door, finishes, placement, and what to avoid.
- Published
- July 15, 2026
- Author
- Blackburn's Interiors, Winter Haven, FL
- Updated
- October 10, 2026
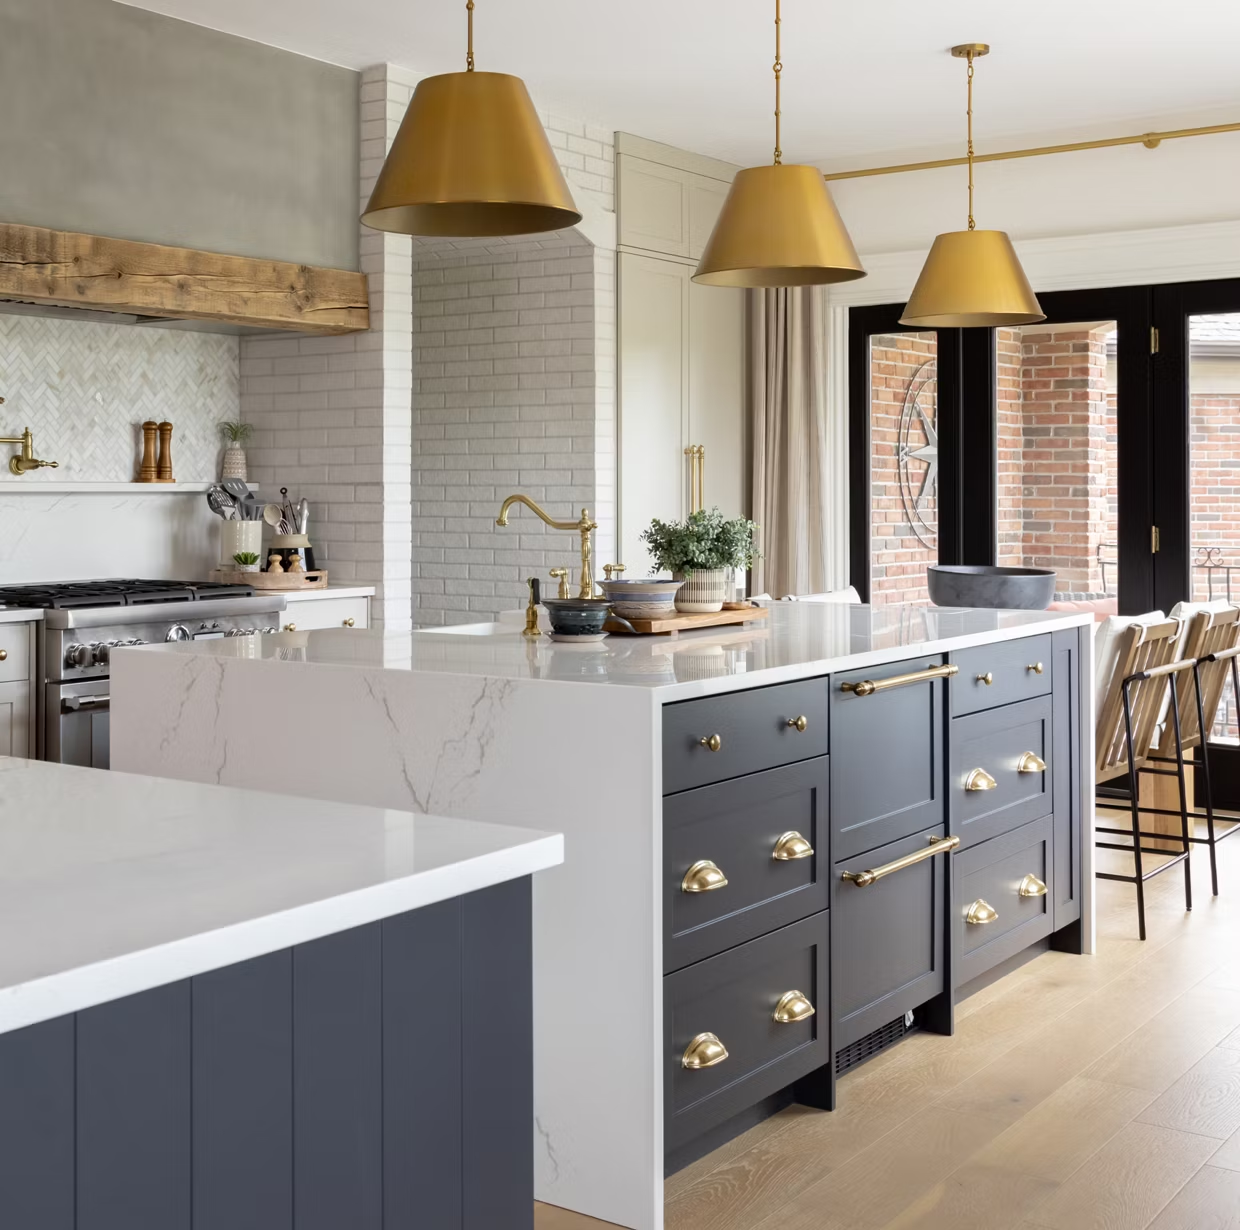
Cabinet hardware is the jewelry of the kitchen. Get it right and a $20,000 kitchen looks like a $40,000 kitchen. Get it wrong and the opposite happens. A beautifully built kitchen reads cheap because the pulls feel mismatched, undersized, or thoughtlessly placed.
Hardware is also the part of the kitchen most homeowners get wrong on their own. Not because the choices are hard. It's that there are so many of them. Pulls or knobs. Length, finish, placement, spacing, mounting. A short guide covers the basics. This is the longer version, written from the cabinets we install across Polk County.
The Quick Version
- Pulls go on drawers; knobs or pulls go on doors. Both work on doors, both opinions are valid.
- Pull length follows the 1/3 rule: about one-third the width of the drawer or height of the door.
- Wide drawers, around 30 to 36 inches and up depending on the maker, can take one long pull or two evenly spaced shorter pulls
- Knob and pull placement on doors: hardware makers say about 2 to 4 inches from the corner opposite the hinges
- Match the finish to the overall kitchen tone: warm with warm, cool with cool.
- Spend a little more on hardware than feels comfortable. It's the part you touch every day.
Pulls vs Knobs: The Long-Running Debate
Pulls vs knobs is the most common hardware question we hear. Both work. The choice has more to do with the look you want than any rule.
Pulls Everywhere
This is the modern default. Pulls on every drawer and every door, including upper cabinets. Reads clean, current, and intentional. Comfortable to use. Best for contemporary, transitional, and modern farmhouse kitchens. The slight downside is that long pulls on small upper cabinets can look visually heavy if you don't size them down.
Knobs on Doors, Pulls on Drawers
The traditional setup. Knobs on doors give a hand-built, classic feel. Pulls on drawers handle the heavier loads (drawers full of pots and pans need leverage). This combination ages beautifully and works in nearly any kitchen: traditional, transitional, Craftsman, cottage, even modern if you keep both elements minimal.
Knobs Everywhere
Rare in modern kitchens. Knobs on full-extension drawers full of heavy items aren't comfortable. You end up gripping the drawer face or pulling sideways. We don't generally recommend knobs on anything wider than 18 inches if you're going to use it daily. Knobs everywhere can work in a small powder room vanity, a butler's pantry, or a furniture-style piece, but rarely in a hardworking kitchen.
How to Size a Pull for a Drawer
We have a dedicated hardware sizing guide that walks through the 1/3 rule in detail. The short version: pull length should equal about one-third the width of the drawer. Hardware maker Top Knobs draws the same line, capping a pull at one-third of the door length or the drawer width.
Quick reference for common drawer widths:
- 12-inch drawer → 4-inch pull
- 15-inch drawer → 5-inch pull
- 18-inch drawer → 6-inch pull
- 21-inch drawer → 7-inch pull
- 24-inch drawer → 8-inch pull
- 30-inch drawer → 10-inch pull
- 36-inch drawer → 12-inch pull
- 42+ inch drawer → 14-inch pull
Two shorter pulls, evenly spaced, are the other option on a wide drawer. Makers do not agree on where that starts. It is around 30 to 36 inches, depending on the maker. Liberty Hardware says to use two pulls once a drawer is wider than 30 inches.
These are tip-to-tip overall pull lengths, not center-to-center measurements. When you shop, pulls are usually listed by the distance between screw holes (the center-to-center number), but the overall length is what your eye sees. Read the spec sheet for both.
How to Size a Pull or Knob for a Door
Doors are simpler than drawers because their dimensions are more standardized.
For pulls on doors, the 1/3 rule applies: pull length should be about one-third the height of the door. On a standard 30-inch upper cabinet door, a 4-inch to 6-inch pull works well. On a 36-inch lower cabinet door, a 6-inch to 8-inch pull. On a 40-inch tall pantry door, a 10-inch to 14-inch pull. Longer pulls look intentional and read modern; shorter pulls read more traditional.
For knobs on doors, size matters less than placement. Most kitchen knobs land between 1 inch and 1.5 inches in diameter. Smaller knobs (under 1 inch) look undersized on full-size cabinet doors. Oversized knobs (over 2 inches) look heavy unless the whole kitchen is scaled large.
Hardware Placement: Where the Pull or Knob Actually Goes
On Drawers
Center the pull horizontally and vertically on the drawer face. For wide drawers with two pulls, divide the drawer into thirds horizontally. The two pulls should sit roughly at the one-third and two-third marks.
There's one exception: deep banks of drawers in a base cabinet. If you have a stack of three or four drawers in the same column, the pulls on the larger lower drawers often look better placed slightly above center (about a third of the way down from the top). That visually lifts them and matches the cleaner look of the smaller drawers above.
On Doors with Pulls
There is no single correct number, and the hardware makers say so. Their guidelines run from about 2 to 4 inches from the corner of the door, on the side that opens. Amerock's installation guide, dated 2014, says most cabinet makers set door hardware about 3 to 4 inches from that corner. Liberty Hardware gives 2 to 4 inches from the top or bottom edge, depending on the height of the cabinet. Pick one distance in that range and use it on every door. For upper cabinets, the pull goes near the lower outside corner. For lower cabinets, the pull goes near the upper outside corner. The result is a consistent diagonal pattern across the kitchen.
On taller doors (pantry doors, tall storage cabinets), longer pulls usually look better centered vertically rather than placed at the corner. A 14-inch pull on a 6-foot pantry door looks intentional centered; placed at the corner, it looks lost.
On Doors with Knobs
Knobs go in the same corner as pulls, and the makers give the same range: about 2 to 4 inches from the corner, on the side that opens. On a flat slab door, the cabinet maker KraftMaid, in a guide posted in 2024, sets the knob 2 to 3 inches in from both edges. So on a slab upper door, the knob lands 2 to 3 inches in from the bottom edge and 2 to 3 inches in from the opening-side edge.
Slight variation based on door style: shaker doors with a recessed center panel often look best with the knob placed where the inside frame meets the recess, not centered on the rail. The difference is small but reads more intentional.
Picking a Hardware Finish
Finish matters as much as size. The wrong finish makes a beautiful pull look cheap; the right finish makes a $5 pull look custom.
Warm Finishes
- Brushed brass / satin gold: the dominant warm pick for the last five years; reads contemporary
- Polished brass: bright and shiny; classic, working its way back into style after a long absence
- Antique brass: warm, aged look; works in transitional and traditional kitchens
- Champagne bronze: a softer, lighter warm metal; popular with cream and warm-white kitchens
- Aged bronze: darker warm tone; classic in Craftsman and traditional homes
Cool and Neutral Finishes
- Brushed nickel: the safest long-term pick; works in nearly any kitchen
- Polished chrome: bright and clean; reads modern and a touch dated currently
- Matte black: strong, contemporary, high-contrast against white or light cabinets
- Stainless steel: clean, industrial, pairs well with stainless appliances
- Pewter: slightly warmer than nickel; understated
How to Pick a Finish
Three rules of thumb.
First, match the temperature of the kitchen. Warm cabinets, warm counters, warm floors: pick a warm metal. Cool cabinets, cool counters: pick a cool metal. Mixing temperatures can work, but it takes intent.
Second, consider the faucet and lighting. Hardware doesn't have to perfectly match the faucet, but if they're radically different (warm brass hardware + chrome faucet) the kitchen reads disjointed. Pick faucet, lighting, and hardware in the same metal family or in finishes that visibly relate.
Third, hold the finish against the cabinet sample. A finish that looks great in a catalog can look completely different against your actual cabinet color. Always hold a real piece of hardware against a real cabinet door before committing. Most showrooms, including ours, let you do this.
Mounting and Spacing
Most cabinet hardware mounts with two screws through the door or drawer face. The center-to-center distance, the spacing between the two screw holes, is the dimension you'll see on every product page. Common center-to-center sizes: 3 inches (76 mm), 3.75 inches (96 mm), 5 inches (128 mm), 6.25 inches (160 mm), 7.5 inches (192 mm), and 8.8 inches (224 mm). Longer pulls scale up from there.
The most important thing about mounting: drill the holes correctly the first time. Cabinet faces are usually 3/4-inch hardwood or hardwood veneer over MDF. Going through the face requires a sharp drill bit and a steady hand. We use a template jig on every installation to ensure pulls are perfectly aligned across the whole kitchen. Doing this by eye on one drawer is fine. Doing it by eye on twenty drawers is how you end up with hardware that's visibly crooked.
For a new install, factory-drilled hardware holes are an option from semi-custom brands like Medallion. The cabinets arrive pre-drilled for the exact hardware you've selected, which saves install time and guarantees alignment. We recommend this on every kitchen where the hardware is decided before order.
How Much Should You Spend on Hardware?
More than you think. Hardware is the part of the kitchen you touch every single day, every time you open a drawer, grab a cabinet, or reach for a coffee mug. It's also a small percentage of the overall budget, even when you go premium.
Rough 2026 pricing for a typical kitchen with 30 to 50 pieces of hardware:
- Budget: $3 to $8 per piece; total $90 to $400 for a kitchen
- Mid-range: $8 to $25 per piece; total $240 to $1,250
- Premium: $25 to $80 per piece; total $750 to $4,000
- Designer / custom: $80+ per piece; total $2,400+
Budget hardware can look fine on day one but often shows wear within a year. Brushed finishes go uneven, screws strip, plating wears off. Mid-range hardware is the sweet spot for most kitchens. Premium and designer hardware adds real visual weight and longevity, especially in a forever home.
If you're remodeling a full kitchen and the budget is tight elsewhere, the smart move is mid-range hardware in a great finish. A $15 pull in brushed brass in the right size, perfectly placed, looks far more expensive than a $50 pull that's the wrong size or wrong finish for the kitchen.
Common Hardware Mistakes
- Undersized pulls on big drawers: small pulls on wide drawers always look unfinished
- Mixing too many finishes: one or two metals is intentional, three or four is chaotic
- Cheap stick-on or magnetic hardware: fine for rentals, never for a kitchen you'll keep
- Mismatched faucet and hardware temperatures: warm vs cool reads jarring
- Inconsistent placement: placing pulls 2 inches from the corner on one cabinet and 3 inches on another
- Buying hardware before the cabinet color is final: always hold them together first
Special Cases
Hardware on Trash Pullouts
Pullout trash and recycling cabinets typically use the same pull as a drawer of similar width. The cabinet door is technically a door, but it operates like a drawer: pull it straight out. Treat it like a drawer for sizing.
Hardware on Appliance Garages and Specialty Cabinets
Tall appliance garages, oven cabinets, and microwave cabinets often have doors that lift or pivot rather than swing. Most of these use a pull centered horizontally on the bottom or top edge of the door, not a corner-placed pull. Follow the brand's recommended hardware placement for the specific door type.
Hardware on Inset Cabinets
Inset cabinets sometimes use exposed hinges and finger latches (no visible pulls or knobs at all). When you do add hardware to inset cabinets, smaller pieces tend to look better. The visible frame around the door is already adding visual detail, and oversized hardware fights it. Knobs and small bar pulls usually work best.
Hardware on Glass-Front and Mullion Doors
Glass-front cabinets typically use the same hardware as the rest of the kitchen, in the same size and placement. The exception is decorative latches or pulls that read as part of the door design (more common in traditional kitchens).
How to Test Hardware Before You Commit
Five-minute test that saves expensive mistakes:
- Hold the hardware against a sample of your cabinet color in the kitchen at different times of day
- Hold the hardware near your faucet and lighting to check finish compatibility
- Grip the pull or knob in your hand. Does it feel comfortable, balanced, the right weight?
- If you're going pull + knob, hold both pieces near each other to see if they read as a set
- Buy one or two pieces, install them on a drawer, live with it for a week before ordering the rest
Bottom Line
Cabinet hardware is small in cost and outsized in impact. The right pull, the right size, the right finish, the right placement turns a good kitchen into a great one. The wrong choice undoes a beautiful build.
Get the size right using the 1/3 rule. Pick a finish that matches your kitchen's temperature. Spend a little more than feels comfortable on something you'll touch a thousand times this year. And bring samples to a Winter Haven showroom visit. We'll let you hold the hardware against your cabinet color and grip it in your hand before you order. Contact us when you're ready.
Sources
- Top Knobs, Guide to Decorative Hardware Size Selection (the one-third pull-to-door/drawer sizing rule)
- Amerock, Installing New Cabinet Hardware (2014) (most cabinet makers setting door hardware about 3 to 4 inches from the non-hinged corner (upper corner on base cabinets, lower corner on wall cabinets))
- Liberty Hardware, How to Choose Kitchen Cabinet Hardware (mounting door hardware opposite the hinges, 2 to 4 inches from the top or bottom edge depending on cabinet height, and two pulls on drawers wider than 30 inches)
- KraftMaid, Cabinet Hardware Placement: Knobs and Pulls Guide (2024) (a knob or the end of a pull set two to three inches from both edges on a slab door, and two pulls coming up for a drawer 30 or 36 inches wide)
More cabinet tips
Have a project of your own?
Free in-home estimates across Polk County.