
Cabinet Tips
Swollen Cabinet Under the Sink: What to Do Before It Spreads
Found a swollen, water-damaged cabinet under your sink? Shut off the valves, dry it inside 24 to 48 hours, then decide between a single sink-base swap and a new run.
- Published
- September 10, 2026
- Author
- Blackburn's Interiors, Winter Haven, FL
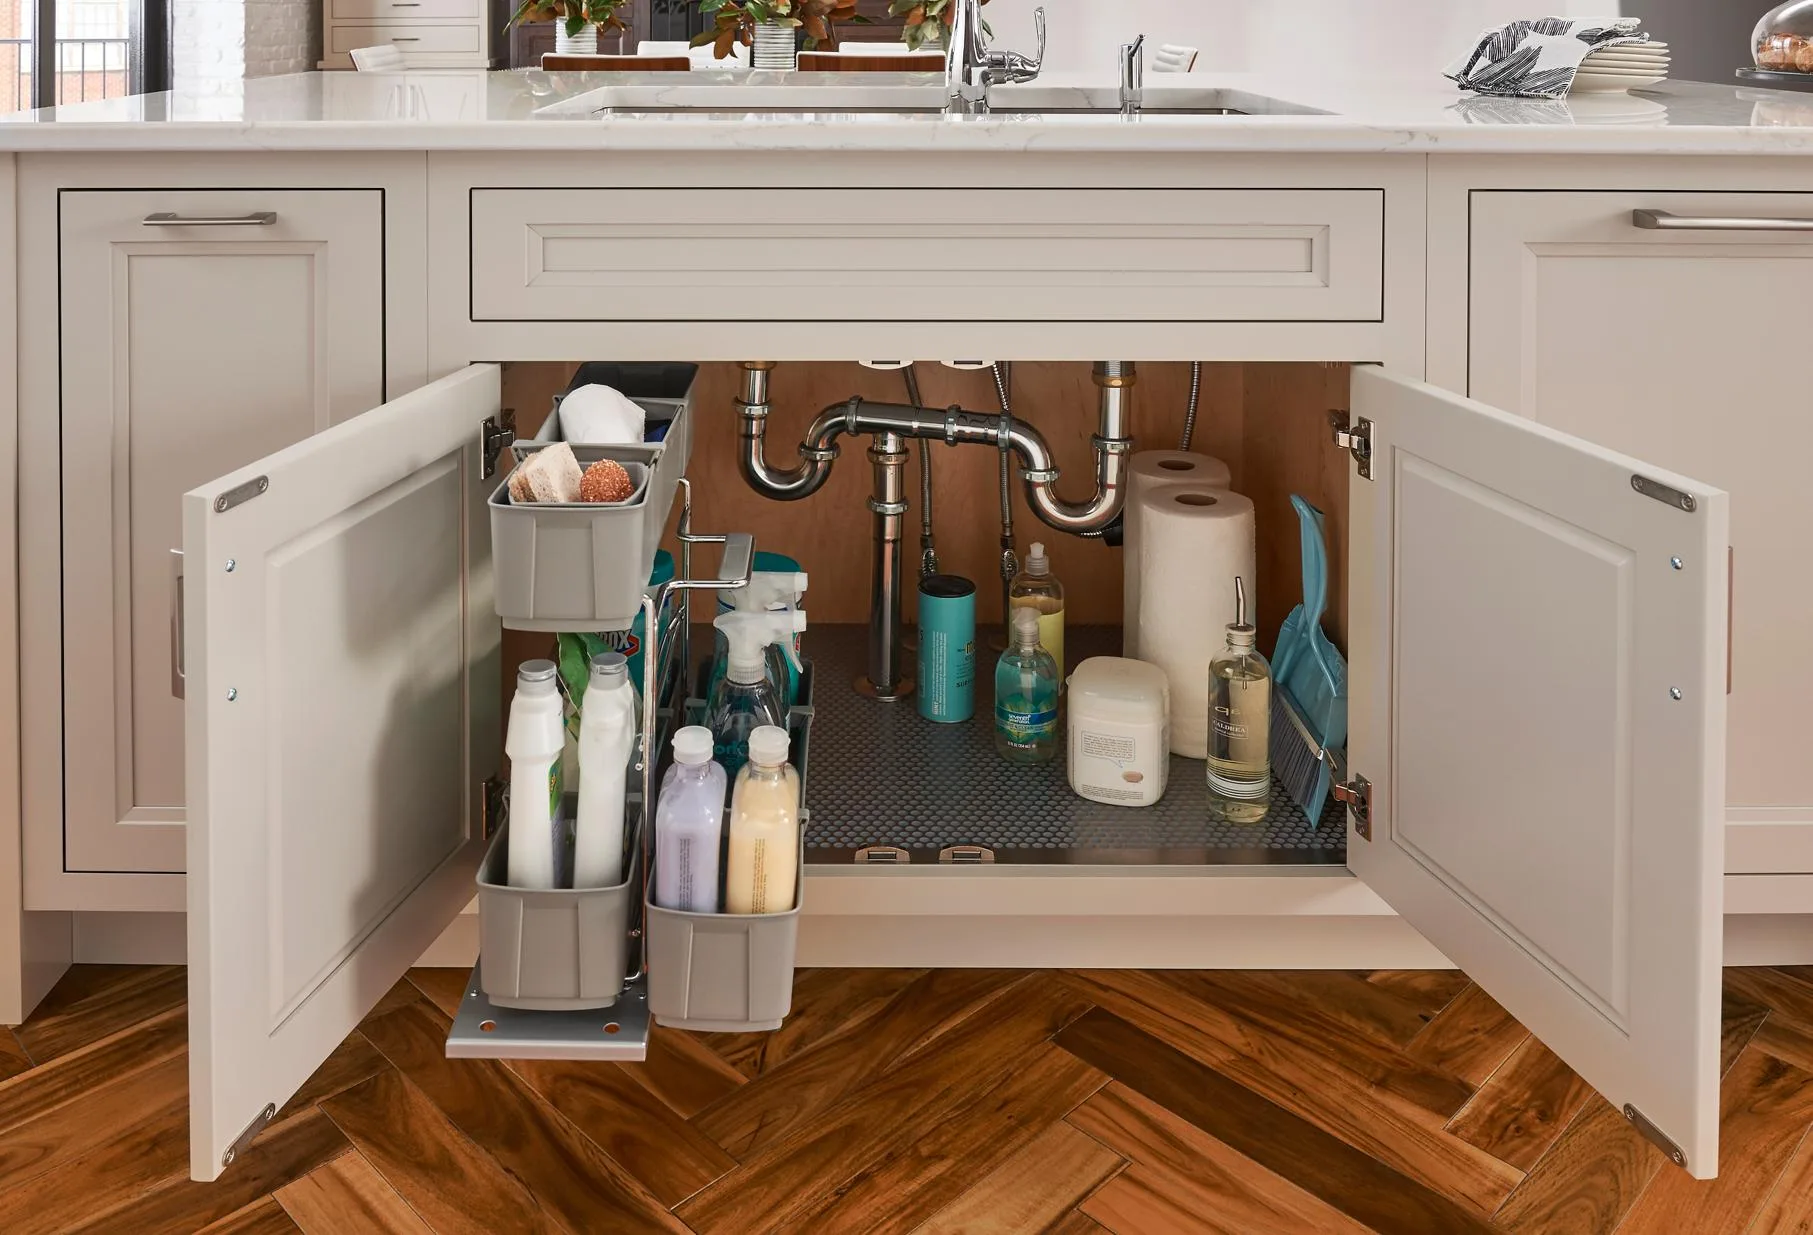
You opened the cabinet under the kitchen sink and something is wrong. The bottom looks puffy. The front edge feels soft under your thumb. Maybe there is a smell. Read the first two sections now and the rest later, because water is still moving while you decide.
We help put Winter Haven kitchens back together, and the sink base fails more often than any other cabinet we see. Almost nobody catches it early. A slow drip hides in a dark box behind the trash can and works on the board for months before anyone notices.
Right Now: Shut Off the Water
Look at the back wall of the cabinet for two small valves, one hot and one cold. Turn them clockwise until they stop. That kills the supply to the faucet. Then work in this order:
- Empty the cabinet all the way out. Cleaners, buckets, the trash can, everything.
- Soak up standing water with towels or a wet/dry vacuum.
- Open the doors and leave them open.
- Lay down dry paper towels and check them in an hour. Wet towels mean water is still running.
If a valve will not turn, stop. Old valves seize and then snap in your hand. Shut the water off at the main instead and call a plumber. Do the same if the valves are closed and water still comes, because that means the leak is upstream of the valve. The sequence above is the standard restoration order for under-sink water damage: kill the supply, empty the box, pull the standing water, and only then hunt for the source.
Find the Actual Leak
Dry every surface first, then watch. A drop shows up fast on a dry pipe and slowly on a wet one. Run your finger along the P-trap, the curved pipe under the drain, and feel for dampness. This Old House recommends that exact check. Then load each part in turn. Run the faucet. Fill the sink and let it drain all at once. Run the dishwasher through a full cycle. The usual suspects:
- Supply lines, and the connections at the valves and up at the faucet.
- The P-trap and the slip joints on either side of it.
- The seal where a garbage disposal mounts to the sink.
- The dishwasher connection that ties into the drain.
- The refrigerator ice maker line, if it runs through this cabinet.
Staining on the cabinet floor counts as evidence even when nothing is dripping right now. It means water sat there before. Take a flashlight to the back corners, where a slow drip runs and hides. Some of this is homeowner work. A loose slip nut tightens by hand, and a supply line swaps out in ten minutes. Resealing a disposal flange or replacing a seized valve is plumber work, and paying once beats paying twice.
Get It Dry, and Hurry
The EPA says to dry water-damaged areas and items within 24 to 48 hours to prevent mold growth. That is your clock, and it started before you found the leak. A sink base fights you on it. It is a closed box with no airflow, shoved under a counter, packed with bottles. Then add Polk County humidity, where the air you are drying with is already damp. Our real window here runs tighter than that national number, especially from June through September.
- Leave the doors open. For days, not hours.
- Point a box fan straight into the cabinet.
- Run a dehumidifier in the room and keep the air conditioner on.
- Lift out any loose cabinet bottom or false floor so air reaches underneath.
- Put nothing back until it is dry and stays dry.
The EPA makes one more point people skip. Clean up the mold without fixing the water problem and the mold most likely comes back. Dry the box, but fix the leak, or you will be reading this page again in the spring.
Cosmetic or Structural? The Test
Once it is dry, decide what you actually have, because these are two different problems and they do not cost the same to solve. Cosmetic damage is a stain, a lifted patch of finish, a dark ring on the cabinet floor. Press it. The board underneath is still firm, and that can be covered. Structural failure has its own tells, and restoration pros use the same short list:
- Edges that mushroom or puff out. The resin bond inside the board is broken, and it does not come back.
- Screws that pull out of the board. Hinges and drawer slides have nothing left to bite.
- A sagging cabinet bottom, or a soft toe kick or bottom rail. Once that goes, the whole box stops carrying the counter above it.
- Board that crumbles onto your fingers when you rub it.
Swollen particleboard cannot be repaired. It can only be replaced. We make that case in full in our guide to cabinet refacing, refinishing, and replacing, so we will not re-argue it here. Just know that a new door on a failed box is money spent to make a dying cabinet look pretty.
Follow the Water
Water does not stay in the cabinet where you found it. It runs down, spreads sideways, and climbs. Climbing is the one people miss. The toe kick, that recessed strip at the bottom of the cabinet, is usually raw unfinished wood. Raw wood pulls water upward by capillary action, the way a paper towel drinks out of a glass. The toe kick is also a dark, unventilated pocket, so nothing in there dries on its own.
Restoration crews report the space under and around cabinets sitting at 100 percent humidity for weeks after the visible floor feels dry. That is how a kitchen can look fine and still smell wrong. So look wider than the swollen box:
- The flooring right in front of the toe kick. Laminate swells at the seams, vinyl can lift, wood cups.
- The base of the cabinets on either side, and across the run if the leak was a big one.
- Under the dishwasher, which shares the same wet zone.
- The subfloor, if the floor feels spongy or sounds different when you walk it.
If water reached the floor, our post on flooring after a flood or hurricane covers what survives water and what has to go. The rules are the same whether the water came from a storm or from a supply line.
The Honest Decision: One Cabinet or the Whole Run
This is where people expect us to say replace everything. We do not. It comes down to three things: how bad the box is, what the rest of the run is made of, and whether the door can be matched.
Swapping just the sink base
If you caught it early and the other cabinets are sound, replacing only the sink base is a real, contained job. Measure the opening, shut off the water, disconnect the plumbing, pull the old box, set and level the new one, screw it to the wall studs, then hang the door and drawers. It takes care around the countertop above it, and it is no thirty-minute fix. But it is one cabinet and one working day for the installers we train and certify, not a remodel.
The part that gets hard: matching the door
The box is the easy half. Two oak raised-panel doors can look identical from across the room and still differ in edge profile, rail width, panel shape, and overlay. Kitchens built from the 1980s into the 2000s often used discontinued styles, regional manufacturers, or a stain nobody mixes anymore. Big box shelves carry current production only.
So there are three honest outcomes. We find a close match, and it reads fine because a sink base sits low and half in shadow. We have a door made to the old profile. Or we admit the only way to make the kitchen look right again is to change every door, which is refacing.
When the whole run is the better call
Replace the run when two answers come back yes. Are the boxes budget particleboard? And was the kitchen already near the end of its life? Particleboard and Florida humidity do not get along. Boxes like that swell at the sink and the dishwasher here in only a few years, sometimes with no leak at all. We break down box construction, door cores, and finishes in our guide to Florida humidity and cabinet materials.
If one box has failed and its neighbors are the same material and the same age, a single swap buys time, not a fix. Put the money where it lasts. Our guide to what kitchen cabinets cost gives you honest ranges before you talk to anybody.
Build the Replacement So It Does Not Happen Again
Whatever you replace, spec the wet zone harder than the rest of the kitchen. The sink base and the cabinet beside the dishwasher take punishment nothing else in the room sees.
- Plywood box construction, or MDF sealed on all six sides. Not bare particleboard.
- A finished, sealed cabinet bottom instead of raw board.
- A drip tray or sink-base liner. It is cheap, and it turns a leak into a puddle you can see.
- Braided stainless supply lines in place of old plastic ones.
- Nothing stored under there that hides a drip. Keep the back corners visible.
Then take a flashlight under the sink once a month. Slow leaks usually get found by smell, months late, after the board is already gone. Thirty seconds a month beats a new cabinet. New cabinets from us go in with installers we train and certify, and our residential labor warranty stands behind that work in your home.
Frequently Asked Questions
Can I sand and repaint a swollen cabinet bottom?
Not if it is truly swollen. Sanding a mushroomed edge takes away board that was never coming back, and paint adds no strength. If the board is firm and only stained, paint or a new laminate skin is a fair repair. If it puffs, crumbles, or will not hold a screw, it is finished.
How long do I have before mold starts?
EPA guidance is to dry water-damaged materials within 24 to 48 hours to prevent mold growth. Inside a closed cabinet during a Florida summer, treat that as the outer edge and not a target. Get air moving the same day you find it, and fix the leak, because the EPA is blunt that mold returns when the water problem stays.
Will insurance cover this?
That is between you and your carrier, and it often turns on whether the leak was sudden or slow over time. Take photos before you tear anything out, keep the failed parts, and write down the date you found it. We cannot make that call for you, but good documentation has never hurt anybody.
The Bottom Line
Shut off the water. Empty the cabinet. Get air moving inside 24 to 48 hours. Then look past the swollen box at the toe kick, the floor in front of it, and the cabinets next door. Once everything is dry, the test is simple. Firm board is cosmetic. Mushroomed edges, pulled screws, and a sagging bottom are structural. One failed box in a sound kitchen is a single-cabinet job. A whole run of old particleboard is a different conversation, and we will tell you which one you have.
Thank you for spending your time here. You had plenty of other places to look this up, and we do not take that lightly. If you are standing in the kitchen right now with a wet towel in your hand, call us at (863) 294-7355 or get in touch. We will tell you what we would do if it were our own kitchen, even when the answer is that you do not need us yet. That is how a family business stays in Winter Haven for three generations.
Sources
- U.S. EPA, A Brief Guide to Mold, Moisture and Your Home (the 24 to 48 hour window to dry water-damaged materials, and that mold most likely returns if the water problem is not fixed)
- PuroClean, Water Damage Under Sink: What to Do Immediately (the immediate order of operations: close the shut-off valves clockwise, empty the cabinet, remove standing water, inspect the P-trap, supply lines, and disposal connections, then dry with fans and a dehumidifier)
- This Old House, How To Prevent Household Plumbing Leaks (running a finger along the P-trap to check for dampness, the faucet, dishwasher, and ice maker connections as leak points, and staining on the sink cabinet floor as a hidden-leak sign)
- 24/7 Restoration Specialists, Can Water-Damaged Particle Board Cabinets Be Repaired? (the cosmetic versus structural test: surface discoloration is coverable, while mushroomed edges, screws that pull out of the substrate, and a compromised toe kick or bottom rail mean the box has failed)
- 24/7 Restoration Specialists, Hidden Scope: Why Adjusters Miss Cabinet Toe-Kick Damage (unfinished toe-kick wood wicking water upward, and the space under cabinets staying at 100 percent humidity for weeks after the visible floor feels dry)
- CabinetNow, Can You Replace a Single Cabinet Door? (why matching an older door is hard: differing edge profiles, rail widths, panel shapes, and overlays, plus discontinued styles and regional manufacturers that big box stock does not carry)
More cabinet tips
Have a project of your own?
Free in-home estimates across Polk County.